IMPASSA Self-Contained 2-Way Wireless Security System (model SCW9057)

This wireless security system is widely used by ADT and companies providing security.

Useful links:

IMPASSA Self-Contained 2-Way Wireless Security System

DSC – IMPASSA Self-Contained 2-Way Wireless Security System – User Video English

DSC IMPASSA 2 Way Wireless Security System

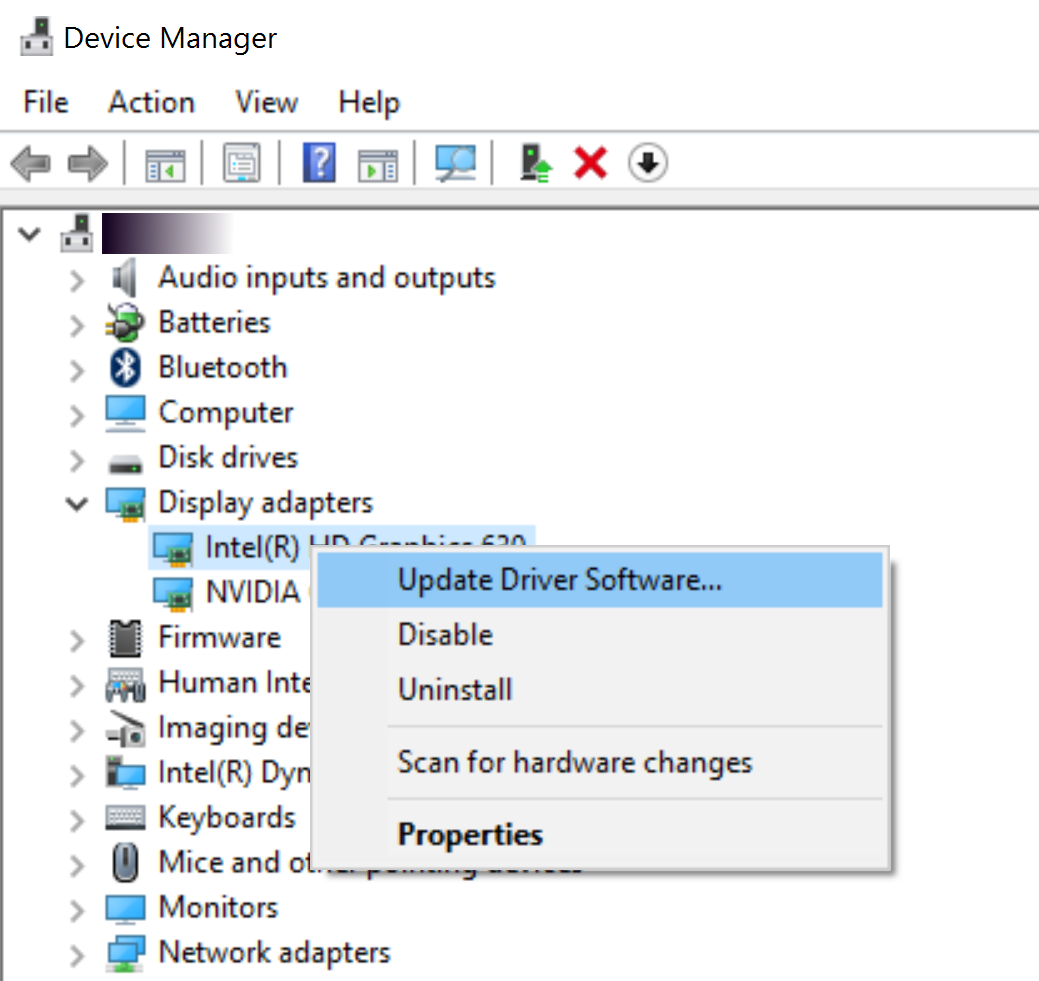
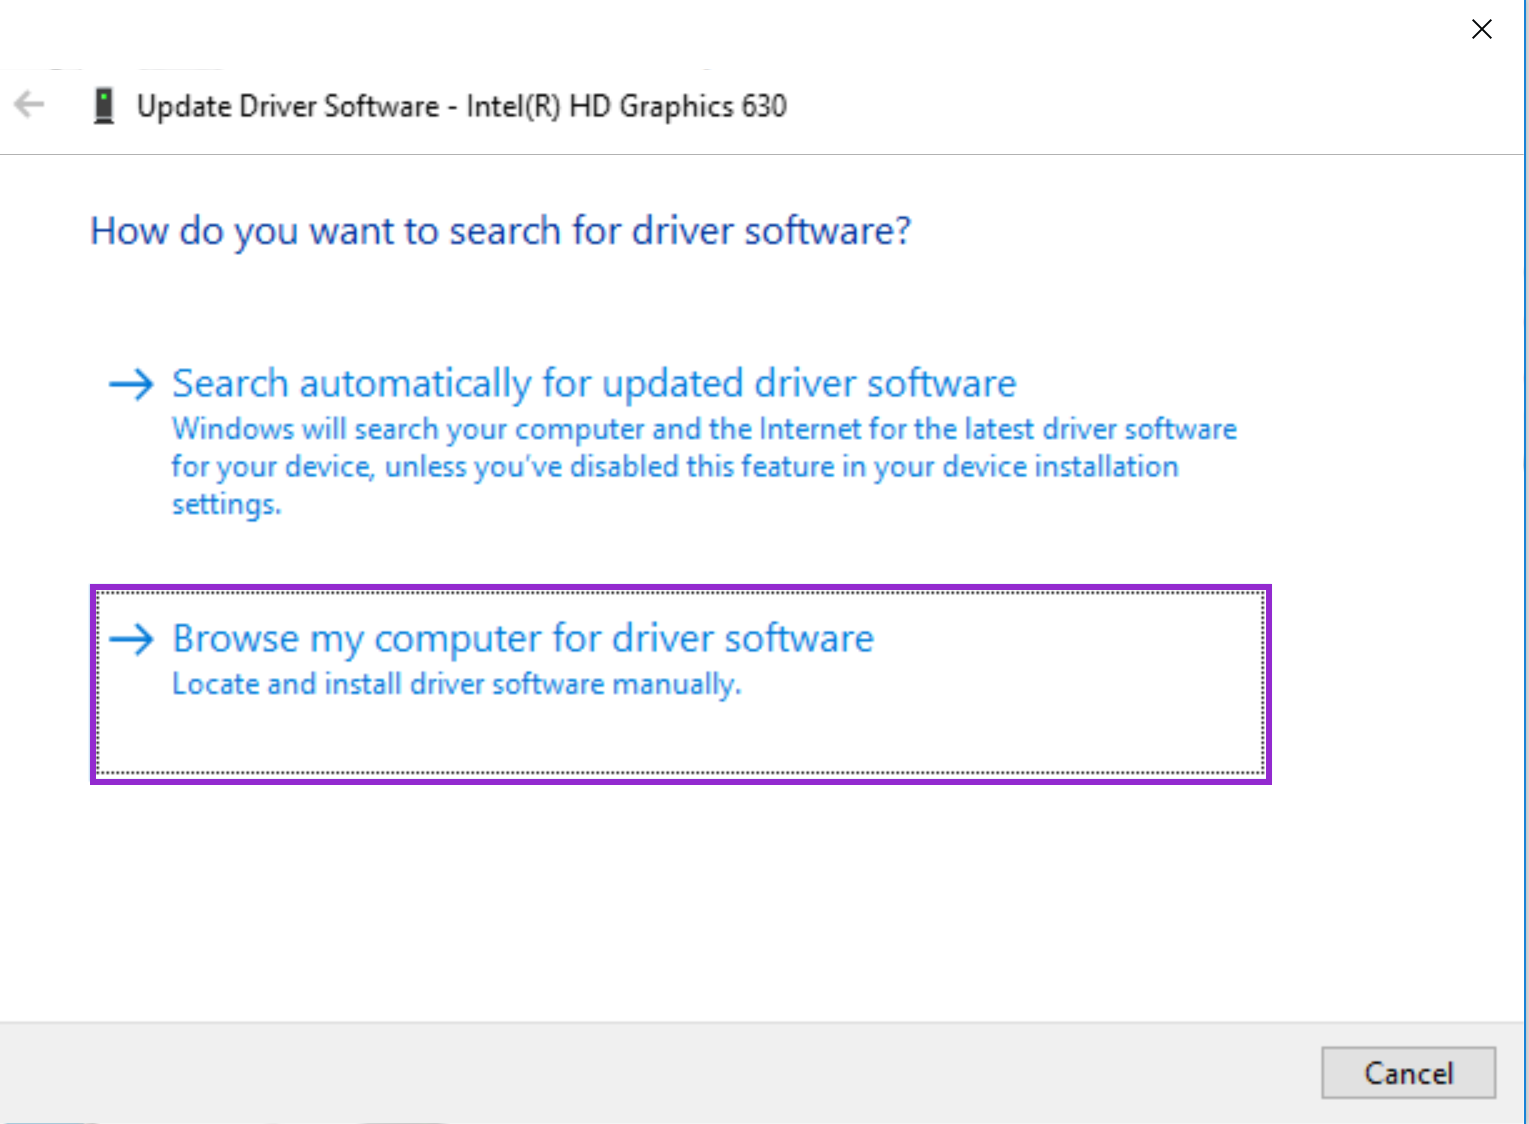
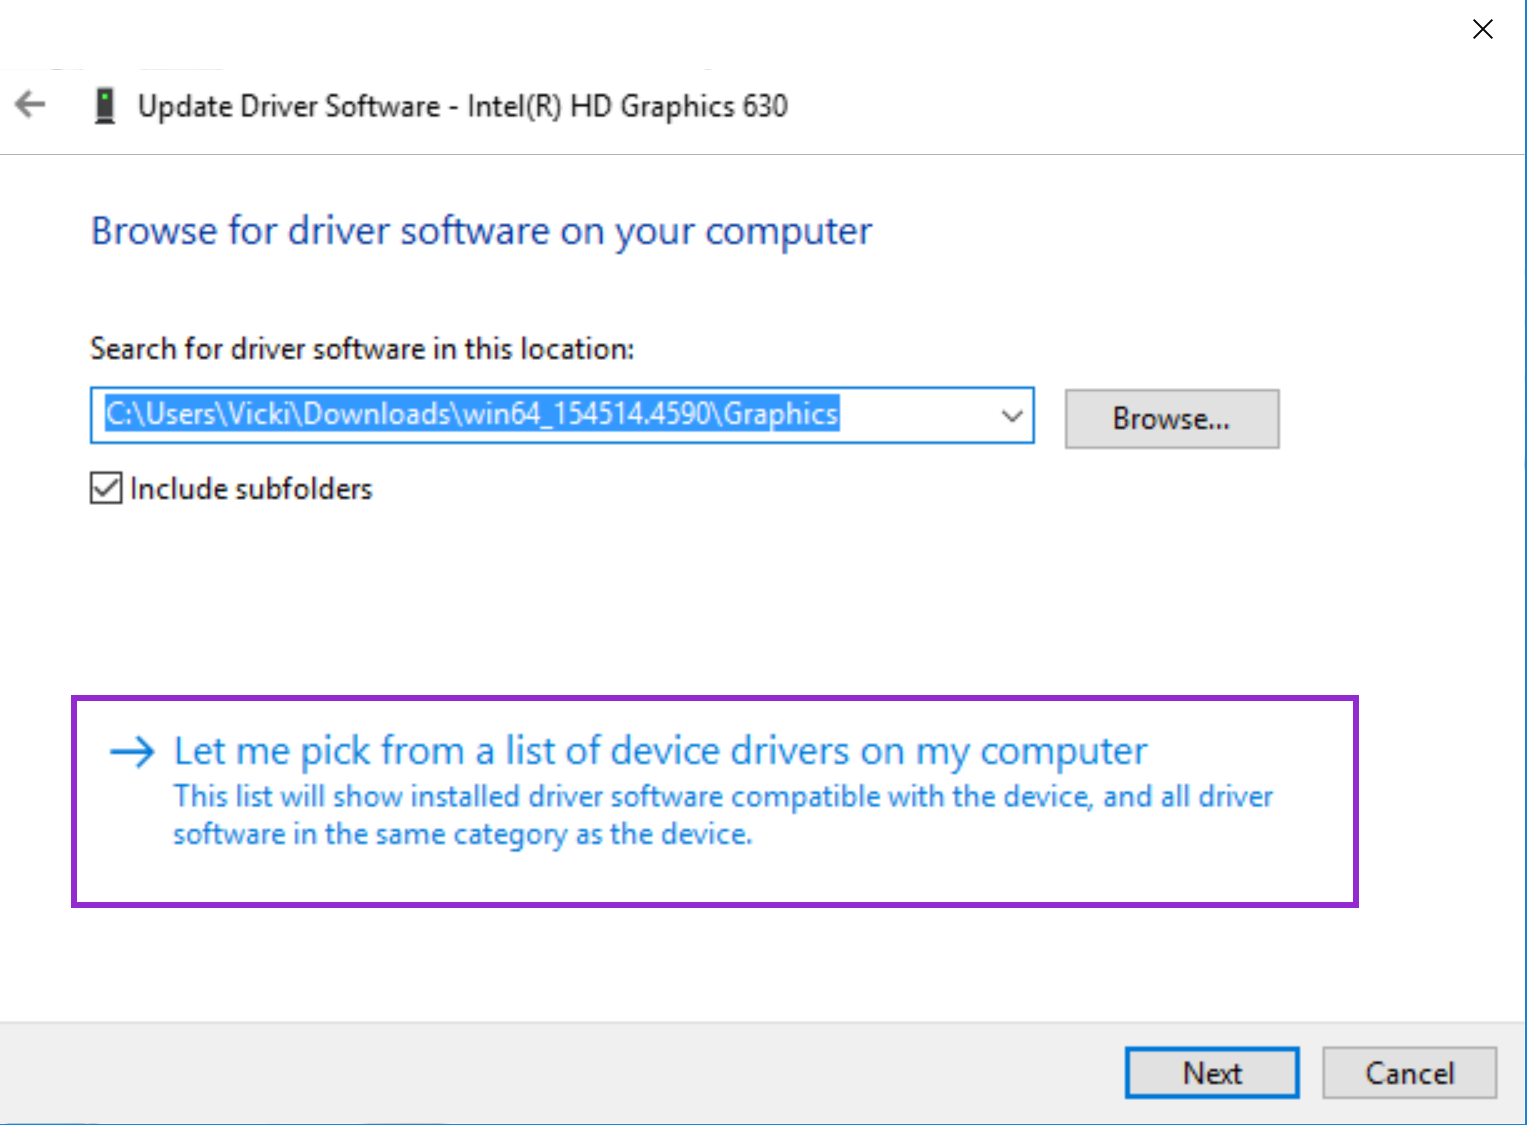
How to Change Master and User Code on DSC Powerseries

How to Program DSC Neo Proxy and PG9939 Keyfob

Default master/installer code

The default code is 1234 or 5555.

It might be changed on your system and if you make few wrong attempts the keyboard will be locked temporarily.

How to reset to factory settings

If you do not have the master code or installer code you are limited in what you can do with the system.

You can do a factory reset and will be able to set your own master code.

NOTE: If you do a factory reset all settings will be lost including any zones, sensor information, etc.

To do a factory reset do the following:

  • turn the AC power off (unplug the transformer)
  • open the front panel (check the user manual on how to do it) and disconnect the battery pack
  • connect IO1 and IO2 with a wire
  • Power the device with AC only. Keep it power for 10 to 20 seconds
  • Power off the device
  • remove the wire between IO1 and IO2
  • connect the battery
  • Turn the AC power on

Now you device is factory reset. You need to configure everything including set the date and time.

The default master/installer code is 1234

Programming

If you have the master/installer code you can do things like

  • adding a new user code for a family member or the cleaning lady
  • adding new sensors
  • programming new wireless remote

Add new user

[*][5] [1][2][3][4]  [<][>]     [*]               [9][7][1][3]     [#]
       master code   select user      to access code    new user code    exit

Delete user

[*][5] [1][2][3][4]  [<][>]     [*]               [*]      [#]
       master code   select user      to access code    delete   exit

Baked Potatoes

Preparation

  • Peel the potatoes and cut them into small pieces (a cube with 1 inch side)
  • Place the potatoes in a baking pan. Make sure you have enough to cover the pan with two layers.
  • Dice two onions and add then to the pan.
  • Add one can of tomatoes (28 OZ / 794g)
  • Add 3 to 5 table spoons of cooking oil
  • Add salt to taste
  • Mix everything well
  • Add water so it covers the mix completely
  • Cover the cooking pan with a tin foil and place in the oven to bake at 425°F
  • Let it cook for at least 1 hour. Check with a fork if the potatoes are soft. If not leave it in the oven and check periodically.
  • When the potatoes become soft it is ready.
  • You can add some parsley at the top.
  • Leave to cool off to a temperature at which it can be consumed

Bon Appétit!


Letsencrypt + Certbot

Letsencrypt provides free SSL certificates

Certbot automates re-newal and installation of the certificates

Install Certbot:

$ sudo add-apt-repository ppa:certbot/certbot
$ sudo apt-get update
$ sudo apt-get install python-certbot-apache

Generate and install the certificate

$ certbot --apache

Generate the certificate only

$ certbot --apache certonly

Generate wildcard certificate

$ sudo certbot certonly --manual --preferred-challenges=dns --email yourname@yourdomain.com --server https://acme-v02.api.letsencrypt.org/directory --agree-tos -d *.yourdomain.com

Renewal

The Certbot packages on your system come with a cron job that will renew your certificates automatically before they expire. Since Let’s Encrypt certificates last for 90 days, it’s highly advisable to take advantage of this feature.

$ sudo certbot renew --apache

Musaka

Ingredients

  • 1 pound of ground meat (50% port / 50% beef)
  • 2 pounds of potatoes
  • 2 onions
  • 1 jar of diced tomatoes
  • 1 bucket of yogurt
  • 2 eggs
  • 1/4 pound of mozzarella
  • 5 table spoons of flour
  •  1/2 cup of cooking oil
  • 1 table spoon paprika
  • 1/2 tea spoon black pepper
  • 1 tea spoon savory
  • 1 table spoon salt

Preparation

  • Put the cooking oil in a deep pot and heat. Peel and dice the onion and add it to the pot. Stir regularly. Cook until the onion gets soft.
  • Mill half of the tomatoes in a food processor and add it to the pot. Add the ground meat and mix it well with the tomatoes and the onion.
  • Add the black pepper, the savory and salt.
  • Cook until the water from the tomatoes is gone or very little is left. Then add the paprika and stir well.
  • In the mean time you had to peal the potatoes and cut it into a small cubes (1/2 inch side). Add them to the pot and stir well.
  • In a baking rectangular pan pour some cooking oil to barely cover the bottom. Mill the other half of the tomato jar and spread evenly on the pan bottom.
  • Pour the mix from the pot to the baking pan and spread evenly. Add 1/2 cup of hot water.
  • Put the baking pan into a pre-heated oven at 400 degrees Fahrenheit. Bake until the water disappears.
  • It is time for the icing. In a big bowl mix one jar of plain yogurt, 2 eggs and shredded mozzarella.
  • Add 5 table spoons of white flower  while constantly stirring. Keep stirring it until you get a very homogeneous mix.
  • Take the pan out of the oven. Pour the icing on top and spread evenly.
  • Put the pan back into the oven.  Cook until the top becomes golden brownish.
  • Take the pan out of the oven and put it aside to cool off. Turn off the oven.
  • You can serve it with parsley on top and yogurt on the side.

This is it!

[XPS 15 9560/Precision 55520] FIX for Lag/Stuttering on Kaby Lake

I bought a Dell XPS 15 9560 recently and after setting it up and updating all drivers, etc. I noticed there was a lag/stuttering when using Google Chrome browser.

It turns out I was not alone – apparently many people noticed the same problem. I came across this reddit thread which helped me to fix the issue: [XPS 15 9560/Precision 55520] FIX for Lag/Stuttering on Kaby Lake

The problem seems to be a buggy driver for the Intel HD Graphics 630 display adapter.

The most current version (as of the time of writing) on the Dell web site is version 21.20.16.4574

In order to fix the problem you need to download version 21.20.16.4590 from the Intel’s web site: Intel® Graphics Driver for Windows [15.45.14.4590]

EDIT (17 April 2017): You should see a yellow banner on Intel’s site saying there is a newer version of the driver:

It is version 15.45.16.4627 and it is working fine on the same computer I installed 4590 before. You may wanna use the newer one. The steps below are the same regardless if you use 4627 or 4590.

There is .exe and .zip file. Download the .zip file and save it on your disk. Extract the files.

Right-click the start button and run Device Manager:

Expand the Display Adapters, right-click Intel(R) HD Graphics 630 and select Update Driver Software…

Important: In the dialog below do not click Next or Browse. Instead click on Let me pick from a list of devices on my computer.

You will see a list of devices. This just shows the graphic card and what drivers are installed. You may have more than one driver installed for the same graphic card. This is normal – when a newer version is installed the old one is kept so you can revert back to an older driver if you want.

Important: The picture below shows one of the items selected – this was my mistake. You do not have to select one. Just click Have Disk… to continue.

Navigate to the folder where the drivers were unzipped. Open the Graphics folder. In my case the full path is C:\Users\Vicki\Downloads\win64_154514.4590\Graphics

There should be an .inf file. Select it and click Open.

This should start the installation. After it is complete verify the driver has version 21.20.16.4590.

Note: The steps might be different for you since I took the screen-shots after I had the new driver installed.

The important part is to not click Next but to choose Let me pick from a list of devices on my computer as mentioned earlier.

This seems to fix the lag/stuttering I was experiencing. I hope this works for you too.

Your connection is not private

Update 2/19/2017: I got a new certificate from www.sslforfree.com Now the site should work with all browsers.


If you were trying to access my blog recently with Google Chrome or Mozilla Firefox the chance is you have seen this warning:

Please, do not get alarmed – I am not trying to steal your information as Google suggests.

I am using a SSL certificate issued by StartCom (www.startssl.com)

StartCom was bought by company called WoSign. Google found that WoSign ” have not maintained the high standards expected of CAs and will no longer be trusted by Google Chrome”. Read the full story here: Distrusting WoSign and StartCom Certificates

If you use Internet Explorer you will not see this warning (as of today 2/12/2017).

In fact if you use online SSL checkers you will see there is no problem with the certificate. These are just some of them:

SSLShopper

DigiCert

SSLLabs


The issue is that Google decided to punish WoSign and I have certificates issued by their daughter company StartCom.

At this moment I am not sure what I am going to do. I have multiple web sites and purchasing certificates from another (trusted) company can be expensive. Alternatively I might opt to not using SSL and HTTPS at all.

Until I decide what to do my suggestion to you is to use Internet Explorer when accessing my sites. Thanks!


Panagyurishte-Style Eggs

  • Boil a water with 1 table spoon of salt  in a deep pot
  • When the water reaches the boiling point add 3 table spoons of vinegar
  • Turn down the heat so the water is not bubbly
  • Remove the eggshell and very carefully put the egg’s content into the water from a close distance
  • Wait 30 seconds to a minute to give time the egg white to form
  • Do the same with the next egg, etc.
  • You can place 6 eggs or more depending on the size of the pot.
  • Boil for 5 to 10 minutes, depending on how runny you like your eggs.
  • Remove the eggs from the water and place them into a plate. If you have 6 eggs use 3 plates and put 2 eggs in each.
  • Crushed 1 clove of garlic garlic and mix it with some yogurt. The exact amount depends on your taste and the size of the plate but usually you need enough to cover the lower half of the egg.
  • Add the yogurt mix to the plate.
  • In a small metal pan put 3 table spoons of cooking oil. Heat it on the stove and add a 0.5 tea spoon of paprika. Stir well until. Turn off the stove and pour the mix over the eggs ensuring you place equal amount in each plate.
  • If you have parsley add some at the top

That’s it – enjoy!

Lentil soup

  • In a pressure cooker put 1.5 cups of lentil. Often the lentil has small rocks – make sure to remove these in advance.
  • Use a food processor to mill 1 onion and 3-4 carrots. Add them to the pressure cooker.
  • add 6 table spoons of cooking oil
  • add 12 cups of water
  • close and seal the lid and put on the stove to boil (knob to 6)
  • when the steam from the cooking pot starts to go out turn the stove knob to 4
  • let it cook for another 15 minutes
  • open the valve to release the steam from the pressure cooker
  • when there is no more steam coming out from the cooker open the lid
  • add 3 cups of tomatoes (milled in a food processor) and 3 table spoons of salt.
  • Place the lid back but do not seal it.
  • let it cook for 15 minutes
  • open the lid
  • add two chopped cloves of garlic
  • add 3 table spoons of savory
  • stir everything well, put the lid on, turn off the stove and leave the cooking pot on the stove.
  • let it cool off  to a temperature at which it can be consumed.
  • add a some parsley when serving

This is it – enjoy!

Variant 2

  • In a regular pot put 2 cups of lentil. Often the lentil has small rocks – make sure to remove these in advance and wash it.
  • Use a food processor to mill 1 onion and 3-4 carrots. Add them to the pot.
  • add 6 table spoons of cooking oil
  • add 9 cups of water
  • close the lid of the pot and put on the stove to boil (knob to 6)
  • when it reaches boiling point, turn the stove knob to 4
  • let it cook for another 20 to 30 minutes
  • add 2 cups of tomatoes (milled in a food processor) and 3 table spoons of salt.
  • Place the lid back.
  • let it cook for 5 minutes
  • open the lid
  • add two chopped cloves of garlic
  • add 3 table spoons of savory
  • stir everything well, put the lid on, turn off the stove and leave the cooking pot on the stove.
  • let it cool off  to a temperature at which it can be consumed.
  • add a some parsley when serving

This is it – enjoy!

Chicken with rice

  • Add 6 cups of water in a regular middle-size boiling pan
  • Add 10 to 12 pieces of chicken breast
  • Add 2 table spoons of salt.
  • Put the lid on and place it on the stove to boil (put the knob on 5 or 6).
  • You have to watch it from time to time because a pressure builds and the steam will want to escape. If this happens just crack open the lid to allow the steam to escape and keep it like this or alternatively turn down the heat a bit.
  • There is no set time to wait – it depends on the amount of the meat, the water temperature, etc. Instead you have to poke the meet with a fork from time to time to tell if it is ready. If the meat is soft and and the fork sinks in it without much resistance it is ready.
  • Use a food processor to mill 1 onion and 3 to 4 carrots. Add them to the pan and boil for another 10 minutes.
  • Put 3 cups of rice in a baking pan.
  • Add cooking oil to the rice and stir until all of the rice is mixed well with the cooking oil.
  • Add 5-6 table spoons (at least) of mint to the rice and stir thoroughly again. Make sure to rub the mint between your fingers to make it extra fine before adding it.
  • Carefully pour the water and the meat from the pan over the rice. The meat has to lay on top of the rice, so it can be baked properly later.
  • Put the pan in the oven. Set the temperature to 385 F and bake.
  • When the water is absorbed by the rice and the meat becomes golden/brownish your dish is ready.

Congratulations! You made yourself enough food for a week! Keep refrigerated and re-heat only as much as you can eat at a time.

Consume with a green salad or Shopska salad (like the Greek salad but better 😉 or Tarator.


Veal Soup

  • Add 8 cups of water to a pressure cooker
  • Add veal meat ( 2 steaks with bone)
  • Add cooking oil – 5 table spoons
  • Add salt – 2 table spoons
  • Put the lid on and seal it (twist the handle on the top to secure it in place).
  • Place the pressure cooker on the cooking stove and turn the knob to 6.
  • When a steam is starting to come out turn the know to 4 and keep boiling for 1.5 hours.
  • When the time is up open the valve and let the steam out.
  • Open the lid of the cooker pressure and take the meat out. Keep the water on the stove so it does not cool off.
  • Remove the bones and cut the meat into pieces with size of a nickel (5 cents) or a dime (10 cents)
  • Return the meat into the pressure cooker
  • Chop 2 bell peppers (1 green + 1 red) and add them to the cooker
  • Chop 1 onion and add it too
  • Peel and dice 3 potatoes into pieces the same size as the meat. Add them to the cooker.
  • Close the lid (but do not seal it this time) and boil for 30 minutes (knob at 6)
  • Open the lid and add 1 cup of grinded tomatoes (you can use a tomato paste instead).
  • Let it boil for another 10 minutes.
  • Turn off the stove and let it cool off  bit. You are done!

Serve with bread and a green salad on the side. Enjoy!