https://linuxconfig.org/how-to-install-ubuntu-alongside-windows-11-dual-boot
How to install Ubuntu alongside Windows 11 (Dual Boot)
Reply

https://support.system76.com/articles/desktop-environment/#different-desktop-environments
Change Default Display Manager:
sudo dpkg-reconfigure gdm3
Check which display manager is running:
systemctl status display-manager.service or $ cat /etc/X11/default-display-manager
Restart GDM:
sudo systemctl restart gdm
The first one works the best. Open an SSH connection to the server and run these commands:
sudo su
cd ~
apt update
apt upgrade
apt -y install lxqt sddm xrdp
systemctl status xrdp
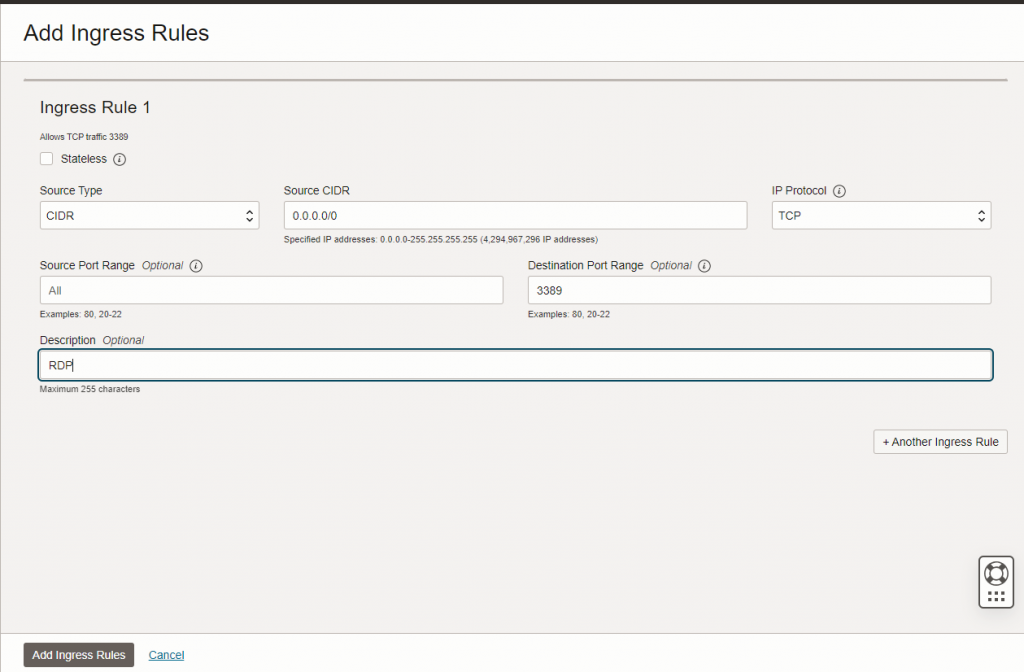
The XRDP port needs to be open in Oracle Cloud and search for ‘Virtual Cloud Networks’. Then select the network and go to the ‘Security Lists’ and click on the default one. Then add ingress rules:
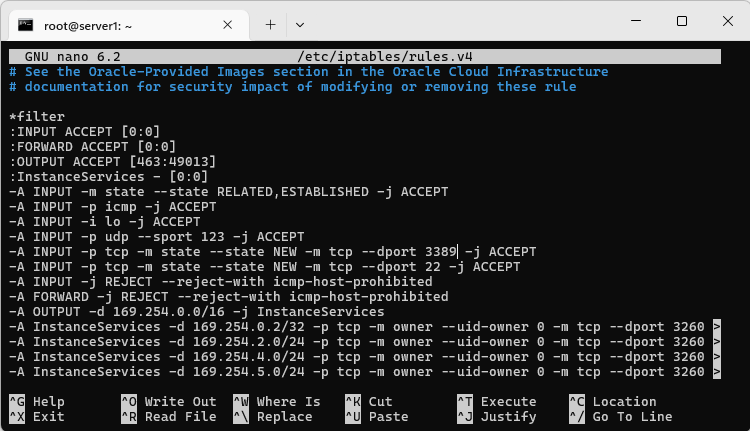
The open the port in iptables by editing /etc/iptables/rules.v4
Make a copy of the rule for port 22 and change the value to 3389
Then run:
iptables-restore < /etc/iptables/rules.v4
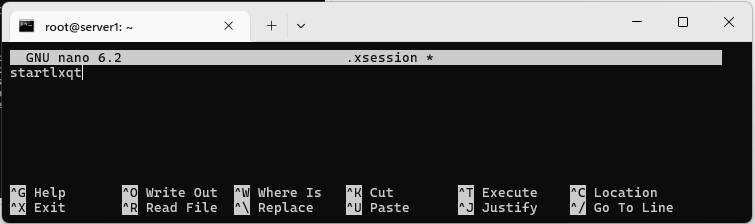
Create a file in your home folder (/root) called .xsession
nano .xsession
Alternative videos – they may install a different desktop:
1) Install Ubuntu 22.04.2 desktop
Install guest agent:
sudo apt-get install qemu-guest-agent
sudo systemctl start qemu-guest-agent
Optional – Add the curret user to the sudo group:
sudo usermod -aG sudo $USER
2) Configure RDP and VNC
fix the lock problem:
3) Install docker
sudo apt install docker.io
add the current user to docker group:
sudo usermod -aG docker $USER
4) Check docker version
docker --version
5) Create a Micro Kubernetes Cluster (microk8s)
See here: https://microk8s.io/docs/getting-started
sudo snap install microk8s --classic --channel=1.27
MicroK8s creates a group to enable seamless usage of commands which require admin privilege. To add your current user to the group and gain access to the .kube caching directory, run the following two commands:
sudo usermod -a -G microk8s $USER
sudo chown -f -R $USER ~/.kube
See the node:
microk8s kubectl get nodes
See the running services:
microk8s kubectl get services
Create an alias:
alias kubectl='microk8s kubectl'
Deploy an app:
microk8s kubectl create deployment nginx --image=nginx
microk8s kubectl get pods
Starting and Stopping MicroK8s:
microk8s stop
microk8s start
export the cluster configuration
kubectl config view --raw > ~/.kube/config
6) Alternatively – install minikube
curl -LO https://storage.googleapis.com/minikube/releases/latest/minikube_latest_amd64.deb
sudo dpkg -i minikube_latest_amd64.deb
start your cluster:
minikube start
Install kubectl:
snap install kubectl --classic
kubectl version --client
7) Install helm
$ curl -fsSL -o get_helm.sh https://raw.githubusercontent.com/helm/helm/main/scripts/get-helm-3
$ chmod 700 get_helm.sh
$ ./get_helm.sh
or using snap:
sudo snap install helm --classic
8) Deploy Prometheus monitoring stack to Kubernetes with a single Helm Chart
helm repo add prometheus-community https://prometheus-community.github.io/helm-charts

helm repo update

kubectl create ns prom

helm search repo prometheus-community

helm install prometheus prometheus-community/kube-prometheus-stack -n prom

helm install ksm prometheus-community/kube-state-metrics -n prom # install the kube-state-metrics

kubectl --namespace prom get pods
Check configmaps and secrets:
kubectl --namespace prom get configmap
kubectl --namespace prom get secret
Look inside a secret file:
kubectl --namespace prom get secret
Check CRDs
kubectl get crd
9) Access Prometheus Dashboard
$ kubectl port-forward -n prom service/prometheus-kube-prometheus-prometheus 9090
10) Access Grafana Dashboard
$ kubectl port-forward -n prom deployment/prometheus-grafana 3000
default user/password is admin/prom-operator
11) Uninstall Prometheus stack
$ helm uninstall ksm -n prom
$ helm uninstall prom -n prom
12) Install and use K8S Lens to explore what was deployed in the kluster: