This is the first in a series of blog posts that talk about running Ubuntu from a USB flash drive.
Ubuntu (/u:’bu:ntu:/ oo-BOON-too) is a Debian-based Linux operating system. For more information about the operating system itself, please check Ubuntu (operating system) on Wikipedia.
Now that you know what Ubuntu is you may still wonder why anyone would like to run it from a USB flash drive. How about having a free full feature GUI operating system that comes with tons of free tools and applications that you can carry with you and run on any computer that has a USB port without the need to install anything? And it will even run on this 10-year old computer in your basement and will recognize all your devices and will install all the necessary drivers automatically. Not convinced yet? Well, I respect your right to do whatever you want with your time – go check what your friends are doing on Facebook or waste couple of hours on Minecraft. If on the other hand you are curious or stubborn enough to keep reading I will show you how to install Ubuntu on USB flash drive in few easy steps.
I will be doing this from Windows. I have 8GB USB flash drive and part of it will be used to host Ubuntu and the rest will be used for sharing files. In order to achieve this I need to partition the USB drive first. In Windows I use EaseUS Partition Master. Download it from here.
Install and run EaseUS Partition Master with the USB plugged in. We are going to create 3 partitions.
Partition 1
Type: Logical
File System: FAT32
Size: 2GB
Label: STORAGE
Partition 2
Type: Primary
File System: FAT32
Size: 1GB
Label: UBUNTULIVE
Partition 3
Type: Primary
File System: EXT2
Size: 4.22GB (The rest of the space)
Label: casper-rw
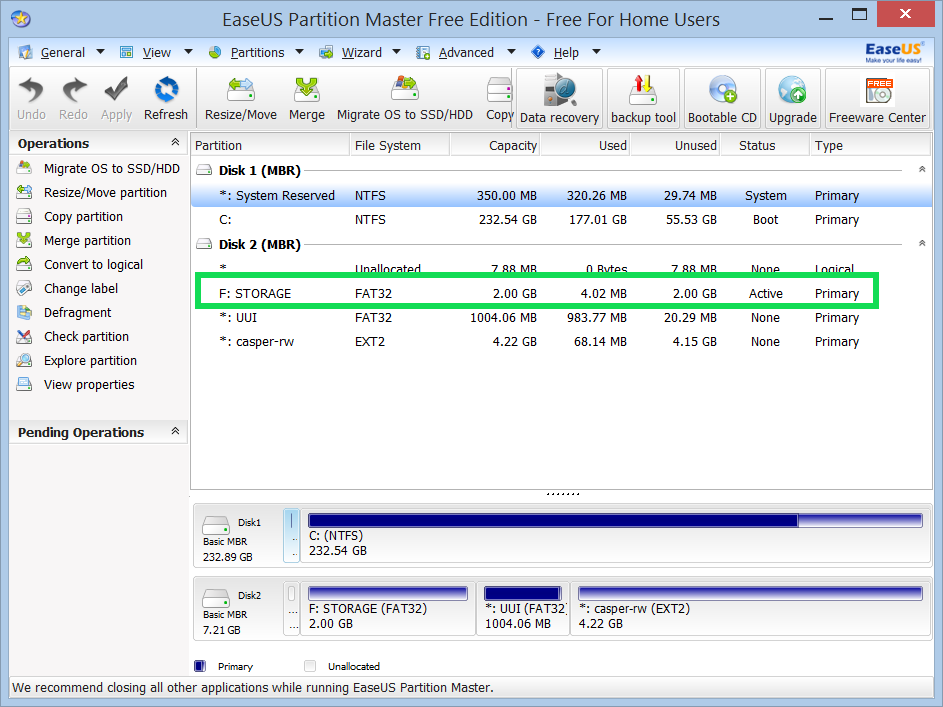
Press the “Apply” button to re-partition the USB drive. You should see something similar:
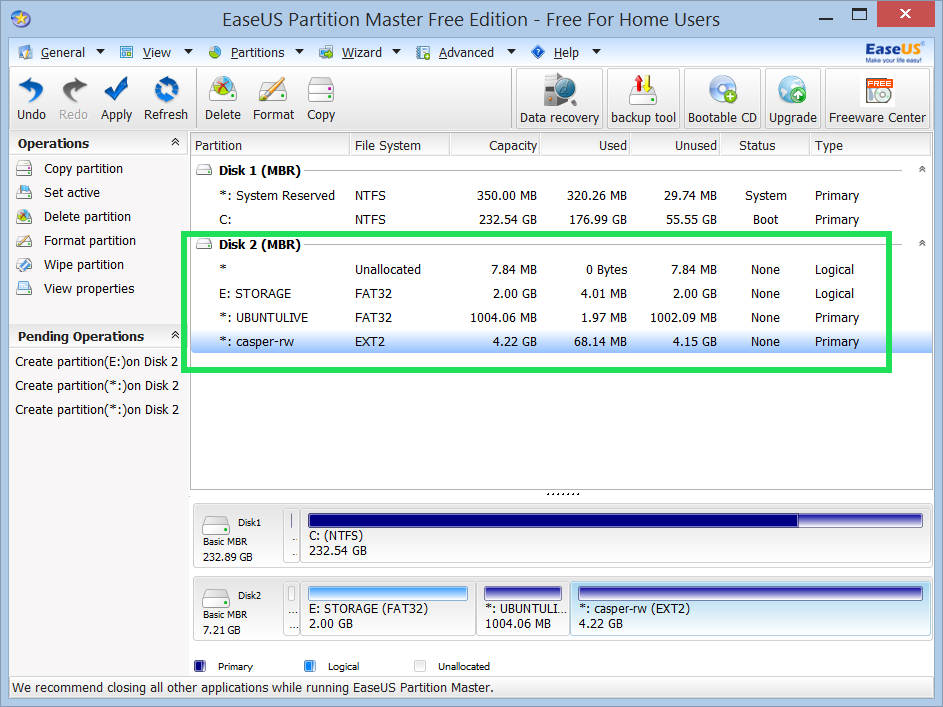
The first partition will be used for file sharing. It is FAT32 because this is the file system that most of the operating systems can read. You can use it under Windows and Linux. If you need more space you can make it bigger at the expense of the last partition (casper-rw).
The second partition is where we are going to install UBUNTU. 1GB is a perfect size. It has to be FAT32 and Primary. Make sure it is set to Active. Since Windows will only show one partition for a removable USB flash drive we need this partition setup as described in order to be accessible in Windows.
The third partition will be used to store any changes we make to Ubuntu – installing new applications, changing the desktop image, etc. EXT2 is a good choice for a file system when it comes to USB flash drive. EXT3 and EXT4 are newer and have some advantages but also come with excessive disk operations which is not desirable for a USB flash.
Now you need to download the Ubuntu ISO file. We want the desktop version. I am using the 64-bit but you should make sure your computer is 64-bit. Otherwise get the 32-bit version. At the time of writing this the latest available version is Ubuntu 14.04.1 LTS.
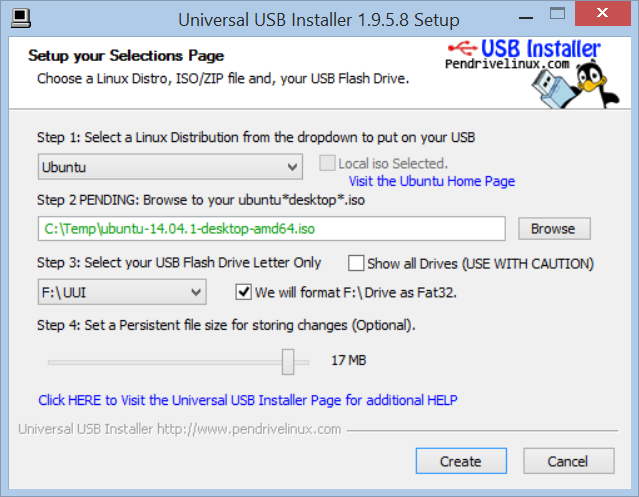
The next step is to install UBUNTU on the USB. There are several tools to do that and I had different results in the past. One that work well for me is Universal USB Installer. Download it.
Run the installer and on the selections page select Ubuntu from the drop-down, browse to the location you saved the ISO file and select the USB Flash Drive from the drop-down. Also use the slider to specify the Persistent file size. Do not slide it all the way to the right because it will complain there is no enough space. Just put the slider in the middle – the size of the file is not important since we are not going to use it at all. We are doing it just to make the installer to update some configuration files that tell the system to persist the changes. We will be using the third partition we created to persist all the changes we are making to our system:
Leave the installer to run and be patient. When it is ready you should see a message like this:

Click the “Close” button to finish. Go to the USB in file explorer and delete a file called casper-rw. This is the file that would keep all the changes normally. Since we have a dedicated partition we do not need it and have to delete it.
The last step will be to hide the UBUNTU partition and instead make the STORAGE partition the active one. Run the EaseUS Partition Master and make the STORAGE partition Primary and set it to Active:
As a result you will see a new drive labeled STORAGE in windows explorer which you can use to for storing files – music, pictures, etc.
Now it is time to boot from the USB. Depending on the computer you have you might have to change the boot order in your BIOS or if it supports a boot menu you can select the USB drive directly from there. Once the GUI loads try to change the desktop background and reboot again. You should see the new background you selected which confirms that the changes we make to the system are persisted between restarting the computer.
This is it! Hopefully it works for you. If you have any problems, please go back and make sure you followed all the steps. If you still have questions, please do not hesitate to ask.
Keep in mind that in general Ubuntu will run much slower from a USB flash drive than from a regular hard-drive. What the USB gives us is a system we can take with us and run on another computer. If you have a dedicated computer on which you would like to run Ubuntu it is much better to install it on your hard-drive. A good information on how to run Ubuntu alongside Windows can be found here:
WindowsDualBoot