Ingredients
- 1 pound of ground meat (50% port / 50% beef)
- 2 pounds of potatoes
- 2 onions
- 1 jar of diced tomatoes
- 1 bucket of yogurt
- 2 eggs
- 1/4 pound of mozzarella
- 5 table spoons of flour
- 1/2 cup of cooking oil
- 1 table spoon paprika
- 1/2 tea spoon black pepper
- 1 tea spoon savory
- 1 table spoon salt
Preparation
- Put the cooking oil in a deep pot and heat. Peel and dice the onion and add it to the pot. Stir regularly. Cook until the onion gets soft.
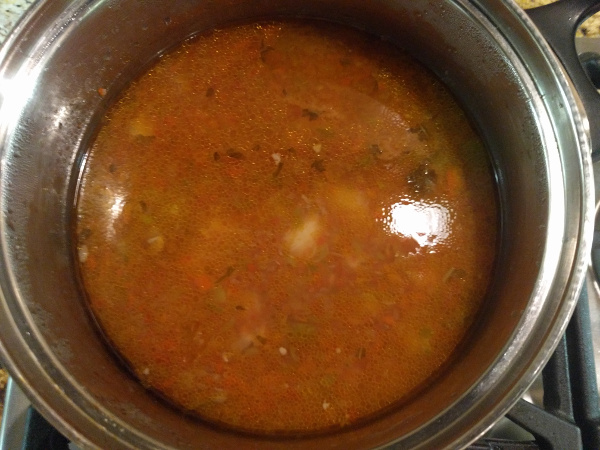
- Mill half of the tomatoes in a food processor and add it to the pot. Add the ground meat and mix it well with the tomatoes and the onion.
- Add the black pepper, the savory and salt.
- Cook until the water from the tomatoes is gone or very little is left. Then add the paprika and stir well.
- In the mean time you had to peal the potatoes and cut it into a small cubes (1/2 inch side). Add them to the pot and stir well.
- In a baking rectangular pan pour some cooking oil to barely cover the bottom. Mill the other half of the tomato jar and spread evenly on the pan bottom.
- Pour the mix from the pot to the baking pan and spread evenly. Add 1/2 cup of hot water.
- Put the baking pan into a pre-heated oven at 400 degrees Fahrenheit. Bake until the water disappears.
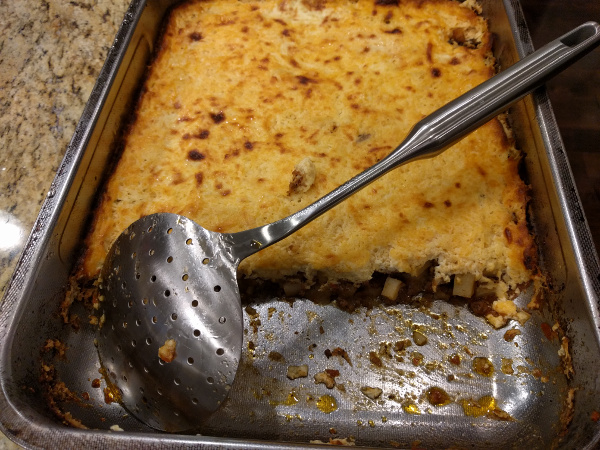
- It is time for the icing. In a big bowl mix one jar of plain yogurt, 2 eggs and shredded mozzarella.
- Add 5 table spoons of white flower while constantly stirring. Keep stirring it until you get a very homogeneous mix.
- Take the pan out of the oven. Pour the icing on top and spread evenly.
- Put the pan back into the oven. Cook until the top becomes golden brownish.
- Take the pan out of the oven and put it aside to cool off. Turn off the oven.
- You can serve it with parsley on top and yogurt on the side.
This is it!