Samsung ATIV Book 6 – Windows 8.1 Drivers

I finally got a new laptop with US-only keyboard. It is a big deal for many people living in Canada because 95% of the laptops sold in the retailer shops have bilingual keyboards.

I bought a nice Samsung ATIV Book 6 from http://www.adorama.com/ via Amazon. Adorama ship to Canada (thank god!).

The computer comes pre-installed with Windows 8. Since Windows 8.1 is available I decided to give it a try. I wanted to do a fresh install vs. upgrade. Since the laptop does not have an optical drive you need to burn the Windows 8.1 ISO file to USB drive and boot the installation from there. I also used the opportunity to upgrade the standard hard drive to SSD following this video (although it is for a different model).

Everything went smooth and I got a freshly installed Windows 8.1. The next step was to make sure I have all the latest drivers. I went to the Samsung’s web site, provided my laptop’s model just to find that there were no drivers available for download:

samsung

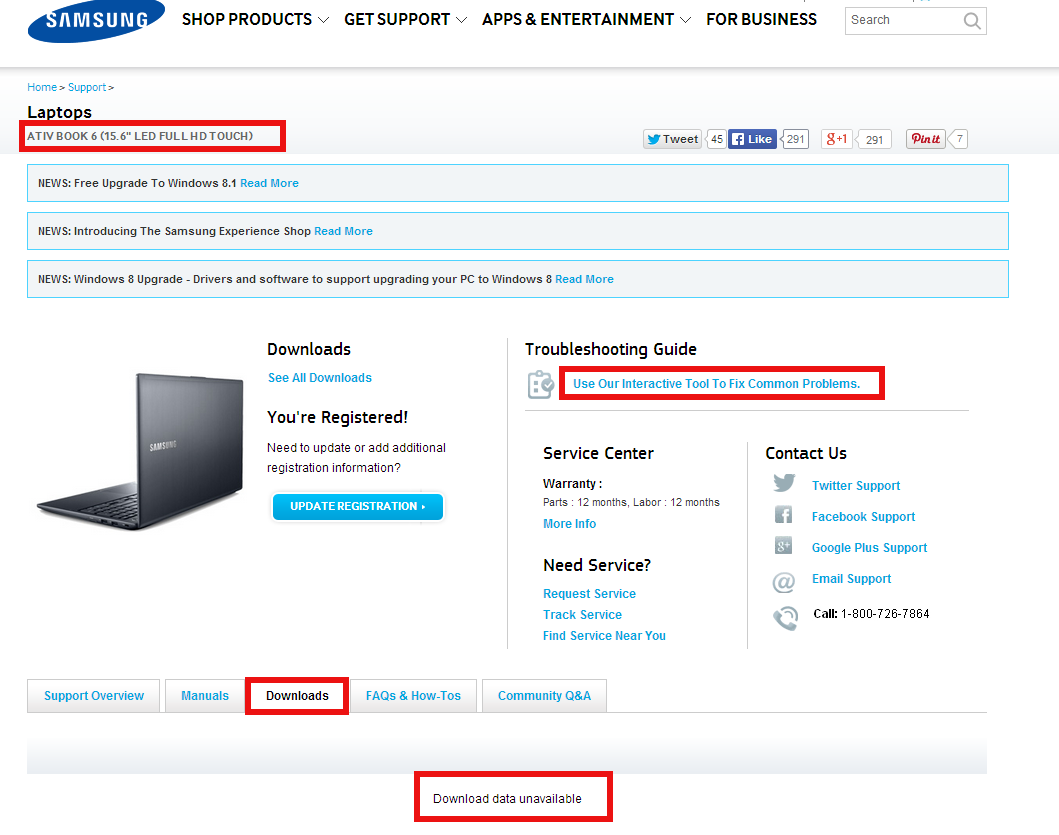
It took me some time to figure it out. If you click the “Use Our Interactive Tool To Fix Common Problems.” and try to “fix” a specific problem eventually you will see a link that allows you to download “SW Update”:

samsung2

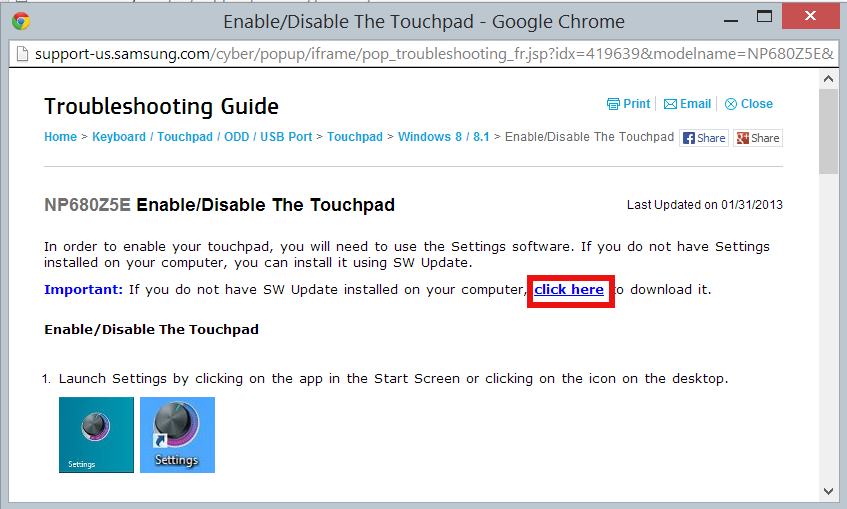
Here is a link to SW Update as of the moment.

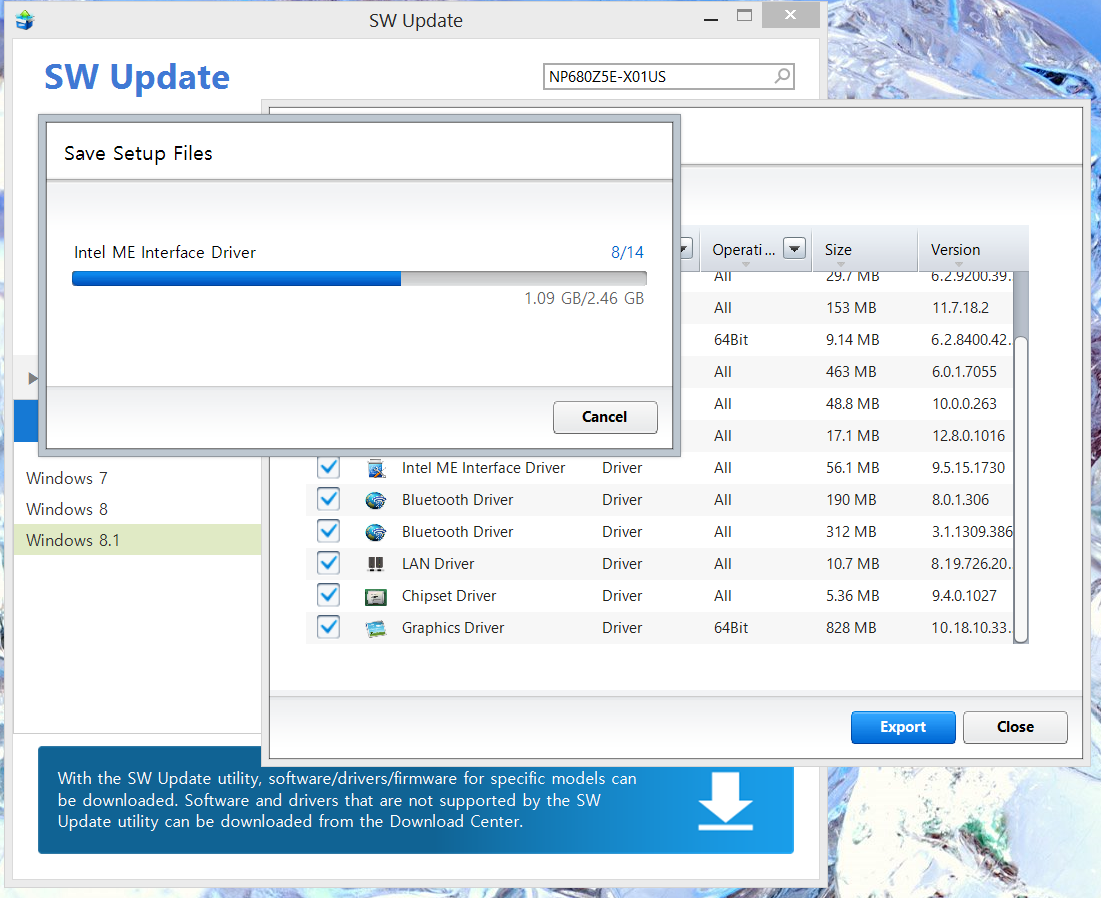
Install it, type in your laptop’s model, choose the version of the Windows and it will show you the list of available drivers. You can choose to download them or you can install them – individually or all at once:

samsung3

I am hoping this might help someone and save them time.

————————————————————————-
EDIT: Just found this: Update to the new Windows. If you click “Firmware and Drivers” it will download the SW Update. It is newer version (2.1.21.0) vs. the link above (2.1.6.45)

Google Chrome looks blurry in Windows 8.1

Recently I bought a new laptop with screen resolution of 1920 x 1080. It has Windows 8.1 on it. At some point I noticed that Google Chrome looked a bit blurry – both the browser UI and the web page displayed. I thought the problem was with the display driver but even after installing the latest version the problem was not fixed.

It turns out the browser was doing “display scaling” because o the high display resolution. It is a setting that you can change. Right-click the Google Chrome icon and select Options:

Google Chrome Properties 1

Google Chrome Properties 2

By default the “Disable display scaling on high DPI settings” is not checked. If you check it the blurriness will go away.

Here is a screen-shot of a blurry screen:

before

This is a screen-shot with the check-box checked:

after

Both images have the same resolution 1016 x 368 pixels. Because the first screen-shot uses scaling things look bigger and blurrier. Less information is displayed. The second picture shows much more content but it looks smaller and sharper. If the font is hard to read you can always use the browser zoom in functionality (Ctrl +) to make the text bigger.

FreeNAS – Setting up ZFS

I always was curious about ZFS but haven’t played with it until very recently. I thought it was too complicated and I was afraid it will use up too much space because of the snapshots capability.

Few days ago I installed the latest beta of FreeNAS 8 on a USB stick (here how it is done) and decided to give a try to ZFS finally.

I use an old laptop and 120GB USB hard-drive. The goal is to create the file system (ZFS) and some Windows (CIFS) shares on top of it that will be available for data storage on my local network.

I will start with creating a group (HomeUsers) and user (john). These will be used later when setting the shares owner. The next two screen-shots show just that:

The newly created group is associated with the user (through the Members button).:

The next step is to create the file system on the USB hard-disk. From the left navigation expand Storage -> Volumes and click on Volume Manager. This will show a pop-up where you type the volume name, select the disk (in this case ada0), the file system type (ZFS) and click Add Volume button:

This will also automatically create a ZFS Scrub for the volume. ZFS has a repair tool called “scrub” which examines and repairs Silent Corruption and other problems. The default interval between consecutive runs is 35 days.

With the new ZFS volume in place you can create either ZFS Volume or ZFS Dataset.

A zvol (ZFS volume) is a feature of ZFS that creates a device block over ZFS. This allows you to use a zvol as an iSCSI device extent for example.

In contrast ZFS datasets allow for more granularity when configuring which users have access to which data. A dataset is similar to a folder in that you can set permissions; it is also similar to a filesystem in that you can set quotas and compression.

NOTE: if your goal is to share an entire ZFS volume, you don’t have to create datasets. If you wish to divide up a ZFS volume’s data into different shares, create a dataset for each share.

The next screen-shot shows creation of a dataset named Backup:

Let’s set the permissions for the new dataset from Storage -> View Volumes -> Change Permissions:

The next thing will be to set up a periodic snapshot for the ZFS volume. The lifetime will be 2 weeks, it will run between 9:00 and 18:00 every hour from Monday to Friday:

Having a periodic snapshots is like having a time machine – you can go back and restore the data to a previous state. This is illustrated in the next article Posted in CodeProject, FreeNAS, Howto | Tagged , | Leave a reply

FreeNAS – Windows (CIFS) Shares on ZFS

In the previous article we talked about Setting up ZFS.

Here we are going to create a Windows (CIFS) share that will be accessible on the local network and will demostrate how to use the ZFS snapshots to restore lost data.

Let’s Add Windows (CIFS) Share from Sharing -> Windows (CIFS) Shares:

Creating a CIFS share will automatically start the service if it is not running already. Alternatively you can manually start or stop the service from Services -> Control Services.

We also have to configure the CIFS service (Services -> CIFS) by providing the NetBIOS name, Workgroup, etc:

Now we can try to access the newly created share by typing \\freenas2\Backup in Windows Explorer:

We have to provide username and password in order access the share. The username is freenas2\john and the password is the one you set up when creating the user:

If you look at the security settings for the share you can see something similar like this:

Now let’s create a simple text file in the share, type some text and save it:

We are going to manually create a snapshot because we do not want to wait an hour for the periodic one to just demonstrate how it works:

We are going to add some more text to the file we created earlier:

Now let’s roll back the snapshot we created – this should bring back the first version of the text file:

Indeed we got the first version of the text file:

This is really a simplistic look at the ZFS snapshots but it at least gives you some idea about how things work. I would personally experiment with bigger files (movies, pictures, etc.) to see how fast snapshots will eat up the disk space.

FreeNAS – Initial configuration

This article is about configuring FreeNAS (v. 8.2 BETA 3).

If you haven’t yet installed FreeNAS have a look at Installing FreeNAS to USB stick first.

We will assume that FreeNAS was installed and running on a remote computer with IP address of 192.168.1.210. Your installation most probably will have a different address. It also happens I have another installation of FreeNAS 7 and the computer is named freenas. Therefore the FreeNAS 8.2 computer is named freenas2.

If I type the IP address mentioned above in a web browser I will see the web interface home screen for FreeNAS as shown below:

You will notice the blinking button that says “Alert” on the right side of the screen. It prompts you to change the admin password (by default there is no password and anyone can access the FreeNAS GUI). Click it and it will take you to the form when you can change the password. You also can reach the form by using the tree-like navigation on the left part of the screen – expand Account -> Admin Account -> Change Password

Next time you will be asked for username (which is admin by default) and password (the one you set up above).

If you check the Change root password as well it will set the root password with the password you typed above.

Next expand Network -> Global Configuration. Here fill in the Hostname, Domain, Default gateway, Nameserver 1 and press the Save button:

You can find most of this information if you open a command prompt (DOS prompt) and type ipconfig /all:

FreeNAS can send you status reports about the system. In order this to work you need to configure the Email settings. From the navigation on the left expand System -> Settings and click the Email tab. The configuration shown below will work if you have a GMail acount. You should be able to figure out what to put in the boxes if you want to use a non-GMail account. Save the settings and click Send Test Mail to confirm it works:

These are some of the settings that I would typically adjust on a newly installed FreeNAS. There are additional setting and I encourage you to explore them. If you need more information you can always click the Help button on the tool bar.

Please make sure to check the next post Posted in CodeProject, FreeNAS, Howto | Tagged , | 1 Reply

Installing FreeNAS to USB stick (new and simpler way)

This is the current article that describes the simplest way of installing FreeNAS on USB stick in Windows without burning installation CD first.

There is an old post about installing FreeNAS on USB stick which is available here but it is more complicated and I encourage you to use this one instead.

Here is how it works:

1) Download 7-zip and install it. If you have another program installed that can work with compressed files you may want to use it instead of 7-zip.

2) Download Image Writer for Windows. Make sure to get the file that ends in binary.zip. I copied the file to C:\Temp and extracted the files into C:\Temp\win32diskimager-binary.

3) Download the FreeNAS from SourceForge The latest stable version at the moment of writing is 8.0.4. I however decided to go with the 8.2 BETA 3 which is the latest available at the moment. You need the file ending in .img.xz

FreeNAS files

I downloaded the file and placed it in C:\Temp

4) Open the file you downloaded in the previous step with 7-zip and extract its content:

It produced a file named FreeNAS-8.2.0-BETA3-x64.img

5) Write the .img file to your USB stick using the Image Writer:

Note: You need 2GB USB stick or bigger.

That’s all. Reboot your computer and make sure the boot from USB is the first choice in the BIOS.

Here is the FreeNAS Documentation Project page that gives you additional information about how to install FreeNAS on USB stick in Linux or OS X:

Burning an IMG File

Script to restore SQL Server database

A lot of people know how to restore an SQL Server database using the SQL Server Management Studio. Sometime it will not work if the database is in use. You have to close all active connections or even to take database offline and then online again.

It is much easier to restore the database via the attached script. Just unzip the file to a folder called C:\RestoreDB and copy the backup file to the same folder. Then edit RestoreDB.bat file and update it with the appropriate information – server name, user name, password, backup name, etc.

The last step is to run RestoreDB.bat – you can double-click it in Windows explorer or can oped a DOS prompt change the folder to C:\RestoreDB and run the script by typing its name and pressing “Enter” key.

RestoreDB_Script