This is the current article that describes the simplest way of installing FreeNAS on USB stick in Windows without burning installation CD first.
There is an old post about installing FreeNAS on USB stick which is available here but it is more complicated and I encourage you to use this one instead.
Here is how it works:
1) Download 7-zip and install it. If you have another program installed that can work with compressed files you may want to use it instead of 7-zip.
2) Download Image Writer for Windows. Make sure to get the file that ends in binary.zip. I copied the file to C:\Temp and extracted the files into C:\Temp\win32diskimager-binary.
3) Download the FreeNAS from SourceForge The latest stable version at the moment of writing is 8.0.4. I however decided to go with the 8.2 BETA 3 which is the latest available at the moment. You need the file ending in .img.xz
I downloaded the file and placed it in C:\Temp
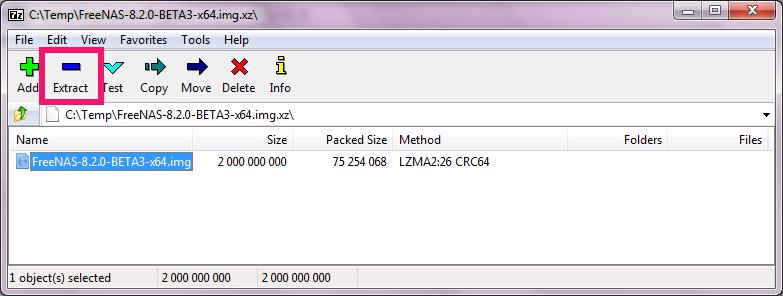
4) Open the file you downloaded in the previous step with 7-zip and extract its content:
It produced a file named FreeNAS-8.2.0-BETA3-x64.img
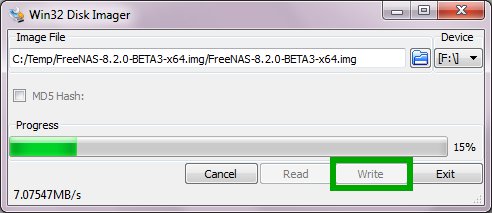
5) Write the .img file to your USB stick using the Image Writer:
Note: You need 2GB USB stick or bigger.
That’s all. Reboot your computer and make sure the boot from USB is the first choice in the BIOS.
Here is the FreeNAS Documentation Project page that gives you additional information about how to install FreeNAS on USB stick in Linux or OS X:


