Tag Archives: freenas
How to Install TrueNAS CORE
Backup Synology NAS to TrueNAS / FreeNAS Server Using RSYNC & HyperBackup | 4K TUTORIAL
Backup Synology NAS to TrueNAS / FreeNAS Server Using RSYNC & HyperBackup
FreeNAS® 11.2-RELEASE User Guide
FreeNAS tricks
http://docs.gz.ro/FreeNAS-command-line.html
Locked out of GUI because of bad SSL Certificate:
ssh -L 9000:localhost:80 root@korkina-freenas.anichin.combrowse http://localhost:9000/
sqlite3 /data/freenas-v1.db “select * from system_settings” sqlite3 /data/freenas-v1.db “update system_settings set stg_guihttpsredirect = 0, stg_guiprotocol=’http’;”
Allow TCP Forwarding and make tunnel:
in /etc/ssh/sshd_config
AllowTcpForwarding yes
sockstat -l | grep 22
kill 2792
/etc/rc.d/sshd onestart
ssh -L 9000:freenas_local_ip:80 root@freenas_public_ip
browse http://localhost:9000/
or
ssh -L 9000:freenas_local_ip:443 root@freenas_public_ip
browse https://localhost:9000/
You might be able to recover from unsuccessful upgrade by connecting via SSH and running:
cd /usr/local/www/freenas/UI
python manage.py migrate system 0101 –fake
python manage.py migrate –merge
sqlite3 /data/freenas-v1.db “.schema system_advanced”
sqlite3 /data/freenas-v1.db “ALTER TABLE system_advanced ADD COLUMN adv_graphite bool NOT NULL DEFAULT false;”
Change default boot environmentbeadm listbeadm activate 9.10.2-U5
reboot
Manually upgrade FreeNAS
cd /tmp
wget https://download.freenas.org/11/11.0-RELEASE/FreeNAS-11.0-RELEASE-manual-update.tar
freenas-update -v FreeNAS-11.0-RELEASE-manual-update.tar
FreeNAS and Couchpotato
A good guide is available here:
Freenas 9.2.0 with Transmission and Couchpotato/Sickbeard as a DLNA-Server
[How-To] Transmission & FreeNAS Shared Mount Points
There is a great tutorial on how to set up FreeNAS with Transmission on the FreeNAS forums:
FreeNAS – Setting up ZFS
I always was curious about ZFS but haven’t played with it until very recently. I thought it was too complicated and I was afraid it will use up too much space because of the snapshots capability.
Few days ago I installed the latest beta of FreeNAS 8 on a USB stick (here how it is done) and decided to give a try to ZFS finally.
I use an old laptop and 120GB USB hard-drive. The goal is to create the file system (ZFS) and some Windows (CIFS) shares on top of it that will be available for data storage on my local network.
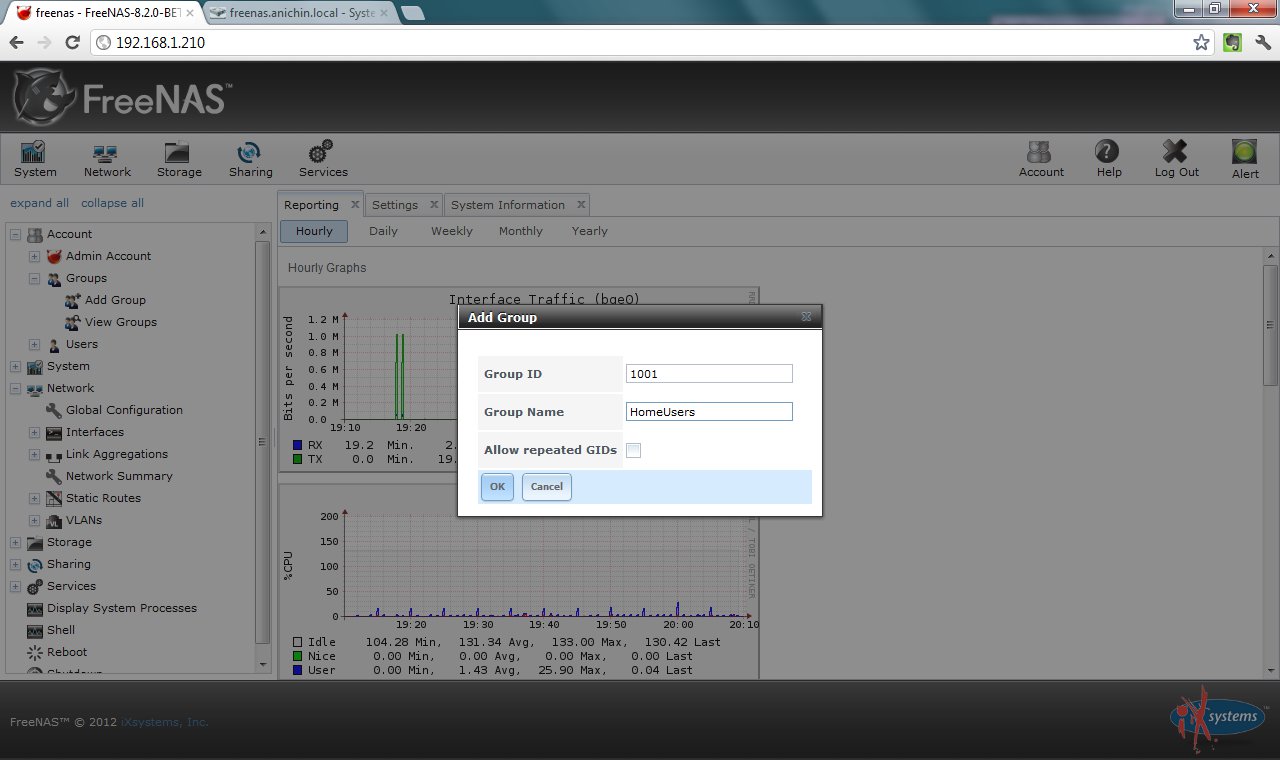
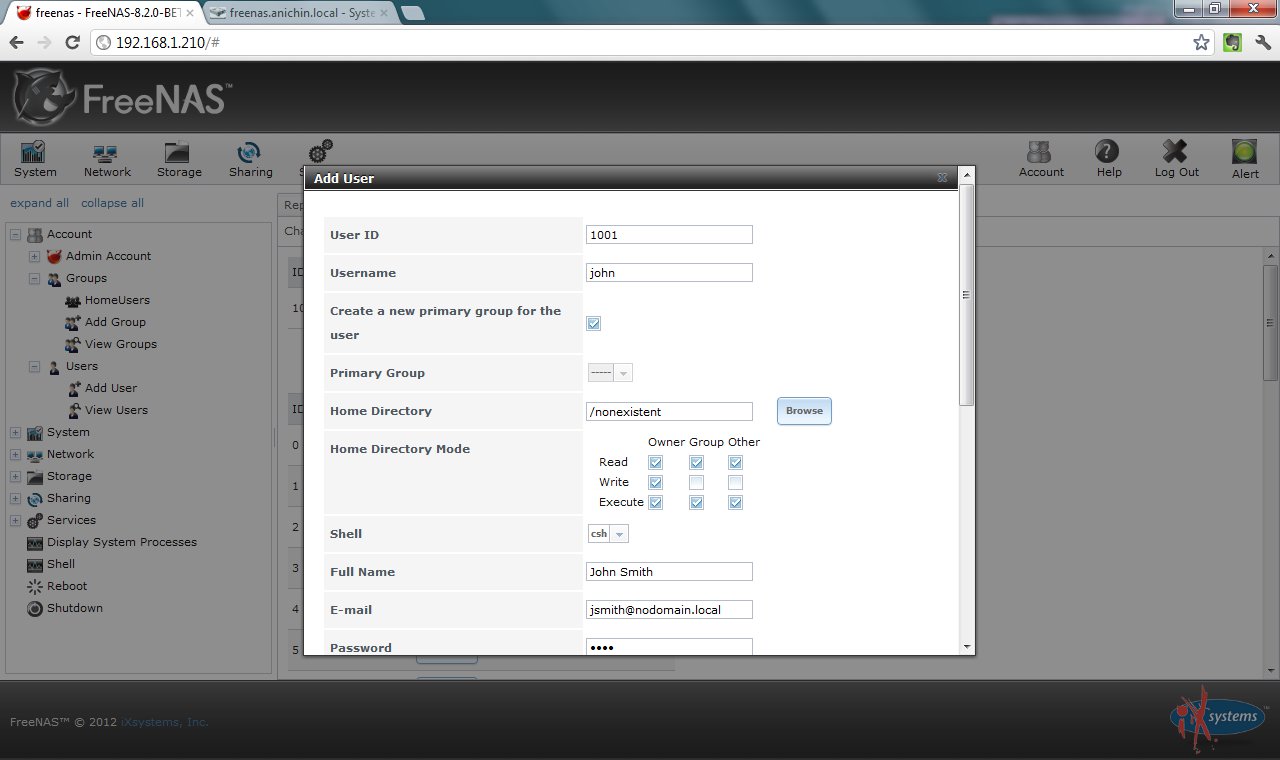
I will start with creating a group (HomeUsers) and user (john). These will be used later when setting the shares owner. The next two screen-shots show just that:
The newly created group is associated with the user (through the Members button).:
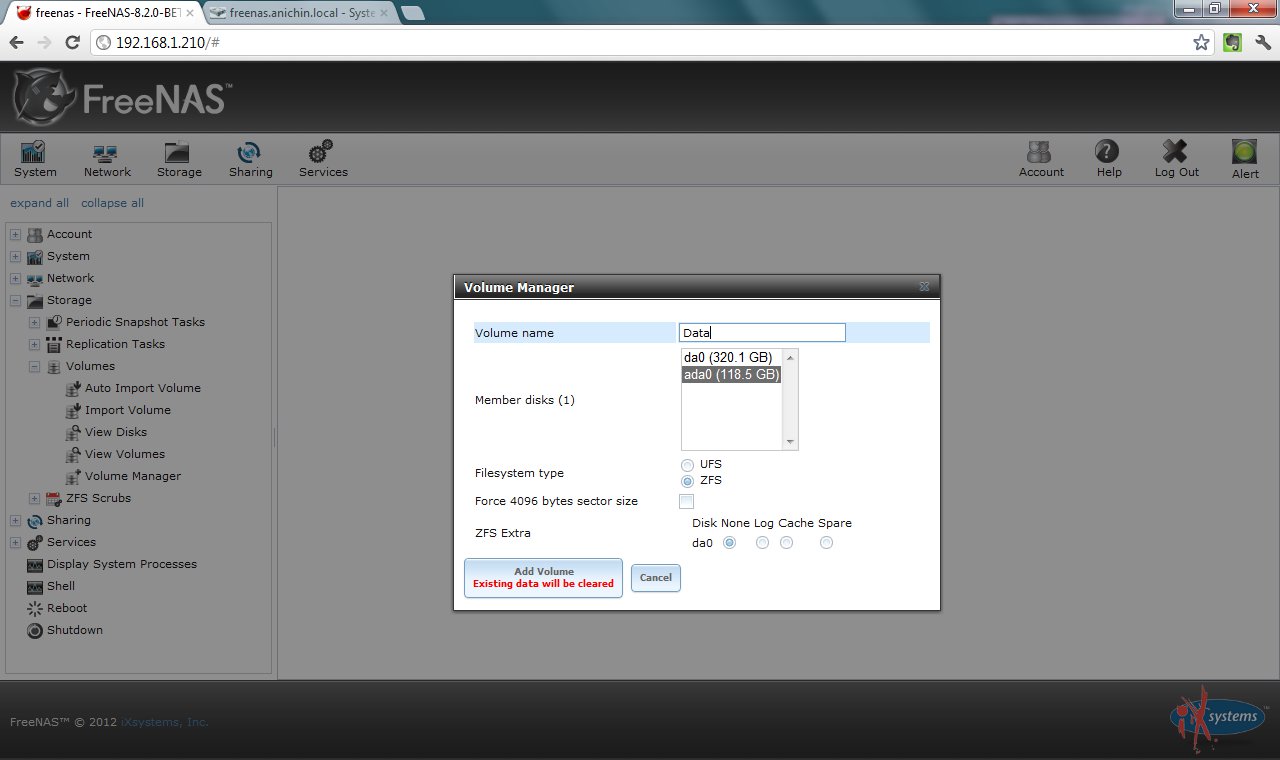
The next step is to create the file system on the USB hard-disk. From the left navigation expand Storage -> Volumes and click on Volume Manager. This will show a pop-up where you type the volume name, select the disk (in this case ada0), the file system type (ZFS) and click Add Volume button:
This will also automatically create a ZFS Scrub for the volume. ZFS has a repair tool called “scrub” which examines and repairs Silent Corruption and other problems. The default interval between consecutive runs is 35 days.
With the new ZFS volume in place you can create either ZFS Volume or ZFS Dataset.
A zvol (ZFS volume) is a feature of ZFS that creates a device block over ZFS. This allows you to use a zvol as an iSCSI device extent for example.
In contrast ZFS datasets allow for more granularity when configuring which users have access to which data. A dataset is similar to a folder in that you can set permissions; it is also similar to a filesystem in that you can set quotas and compression.
NOTE: if your goal is to share an entire ZFS volume, you don’t have to create datasets. If you wish to divide up a ZFS volume’s data into different shares, create a dataset for each share.
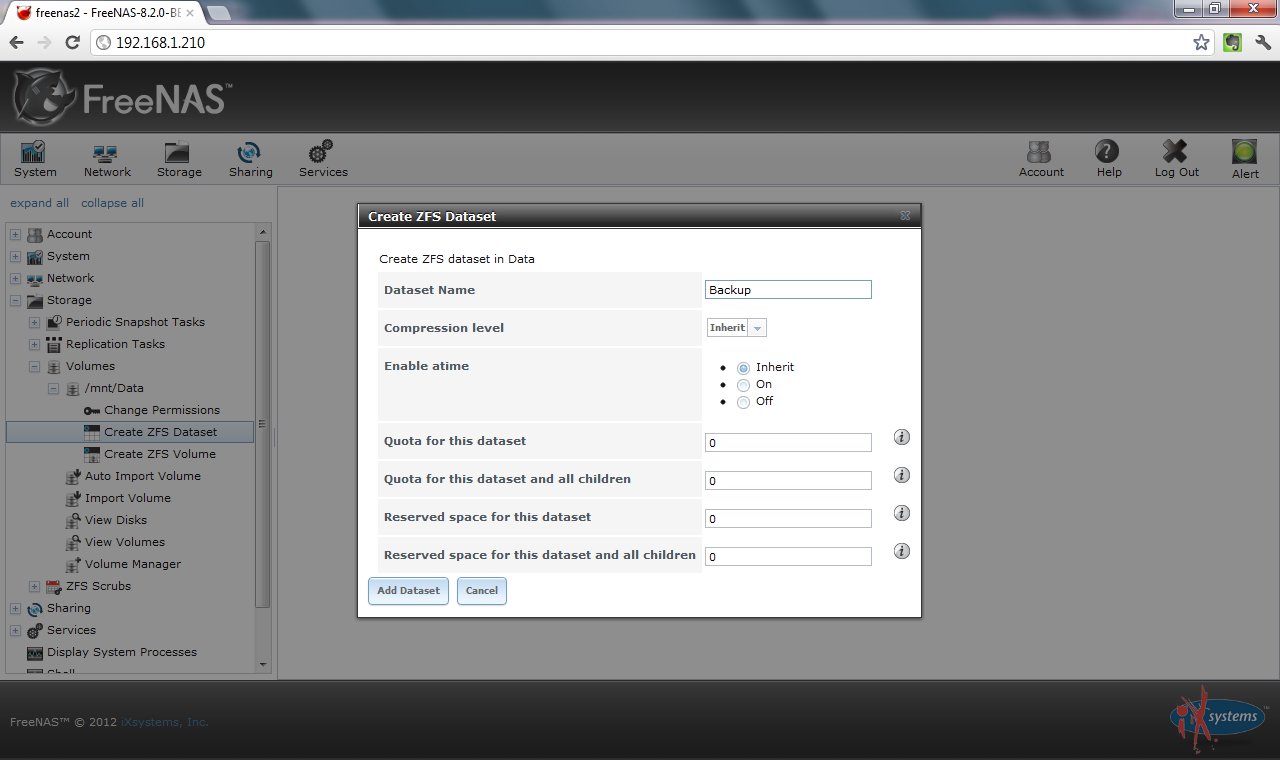
The next screen-shot shows creation of a dataset named Backup:
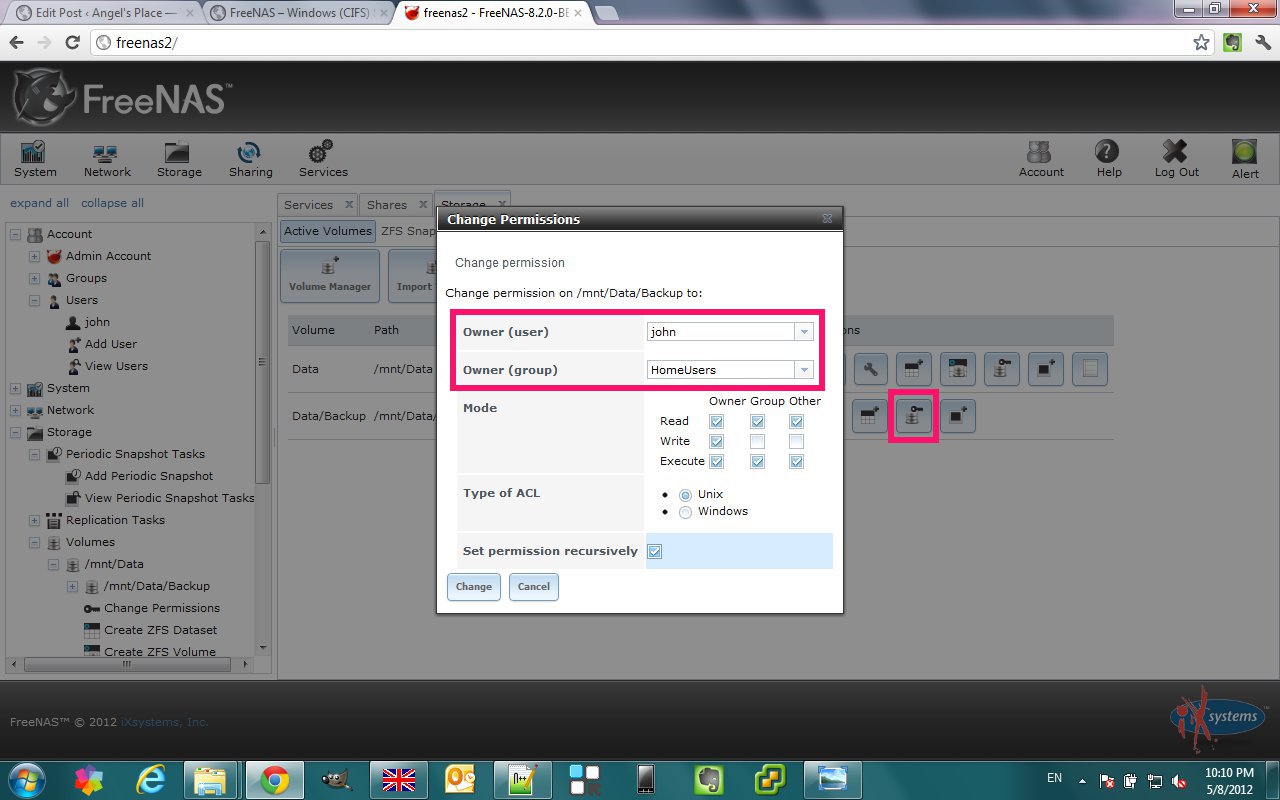
Let’s set the permissions for the new dataset from Storage -> View Volumes -> Change Permissions:
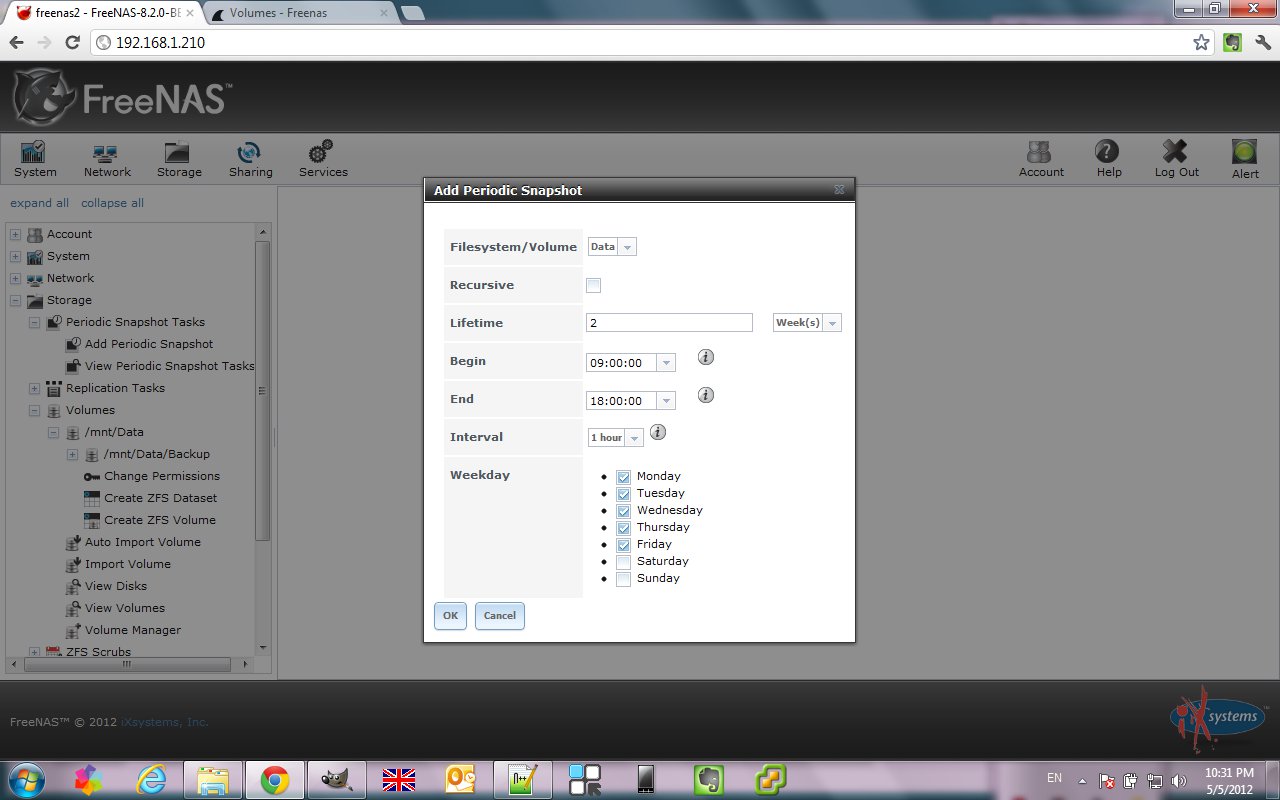
The next thing will be to set up a periodic snapshot for the ZFS volume. The lifetime will be 2 weeks, it will run between 9:00 and 18:00 every hour from Monday to Friday:
Having a periodic snapshots is like having a time machine – you can go back and restore the data to a previous state. This is illustrated in the next article
Posted in CodeProject, FreeNAS, Howto
|
Tagged freenas, ZFS
|
Leave a reply
This is a collection of posts related to FreeNAS 8 (ver 8.2 BETA 3). I am just capturing my experience and would be glad if it is helpful for anyone else. * Installing FreeNAS to USB stick (new and simpler way) *
Posted in CodeProject, FreeNAS, Howto
|
Tagged freenas, FreeNAS 8, home server, Howto, ZFS
|
Leave a reply
FreeNAS 8 Series

