
Contents
Introduction
This is Part 4 of the series of articles about setting up site-to-site VPN between on premise LAN and Azure. Here you can learn how to install and configure strongSwan.
If you missed the Part 3 please check it out here:
Install strongSwan
From Wikipedia: “strongSwan is a complete IPsec implementation for Linux 2.6, 3.x, and 4.x kernels. The focus of the project is on strong authentication mechanisms using X.509public key certificates and optional secure storage of private keys on smartcards through a standardized PKCS#11 interface.”
To install in on the router do this:
Use putty to telnet to the router and then run this command:
opkg list *strongswan*
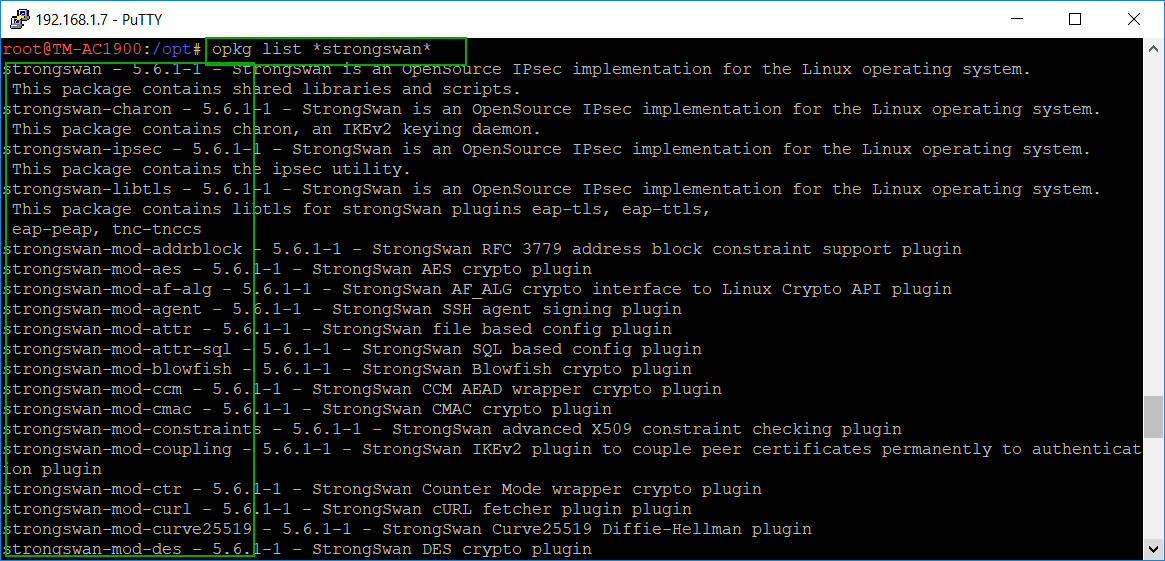 You need to capture the list of modules in order to install them all. I just copied the information from the screen and pasted it in a text file and then split the modules in several opkg install commands:
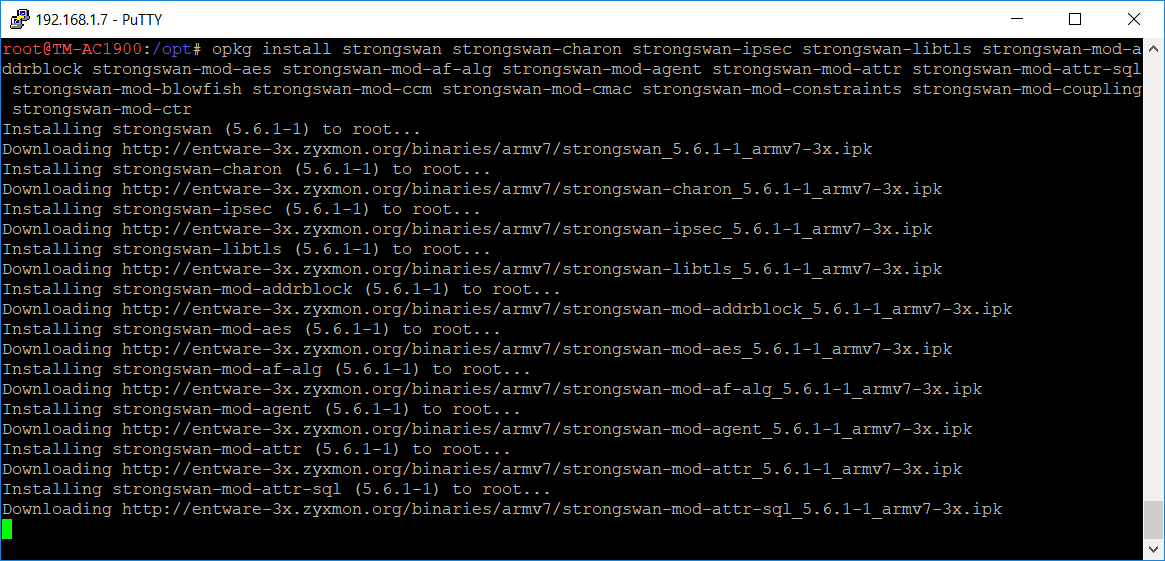
opkg install strongswan strongswan-charon strongswan-ipsec strongswan-libtls strongswan-mod-addrblock strongswan-mod-aes strongswan-mod-af-alg strongswan-mod-agent strongswan-mod-attr strongswan-mod-attr-sql strongswan-mod-blowfish strongswan-mod-ccm strongswan-mod-cmac strongswan-mod-constraints strongswan-mod-coupling strongswan-mod-ctr
opkg install strongswan-mod-curl strongswan-mod-curve25519 strongswan-mod-des strongswan-mod-dhcp strongswan-mod-dnskey strongswan-mod-duplicheck strongswan-mod-eap-identity strongswan-mod-eap-md5 strongswan-mod-eap-mschapv2 strongswan-mod-eap-radius strongswan-mod-eap-tls strongswan-mod-farp strongswan-mod-fips-prf strongswan-mod-gcm strongswan-mod-gcrypt strongswan-mod-gmp
opkg install strongswan-mod-gmpdh strongswan-mod-ha strongswan-mod-hmac strongswan-mod-kernel-libipsec strongswan-mod-kernel-netlink strongswan-mod-ldap strongswan-mod-led strongswan-mod-load-tester strongswan-mod-md4 strongswan-mod-md5 strongswan-mod-mysql strongswan-mod-nonce strongswan-mod-openssl strongswan-mod-pem strongswan-mod-pgp strongswan-mod-pkcs1
opkg install strongswan-mod-pkcs11 strongswan-mod-pkcs12 strongswan-mod-pkcs7 strongswan-mod-pkcs8 strongswan-mod-pubkey strongswan-mod-random strongswan-mod-rc2 strongswan-mod-resolve strongswan-mod-revocation strongswan-mod-sha1 strongswan-mod-sha2 strongswan-mod-smp strongswan-mod-socket-default strongswan-mod-socket-dynamic strongswan-mod-sql strongswan-mod-sqlite
opkg install strongswan-mod-sshkey strongswan-mod-stroke strongswan-mod-test-vectors strongswan-mod-unity strongswan-mod-updown strongswan-mod-vici strongswan-mod-whitelist strongswan-mod-x509 strongswan-mod-xauth-eap strongswan-mod-xauth-generic strongswan-mod-xcbc strongswan-pki strongswan-scepclient strongswan-swanctl
Configure strongSwan
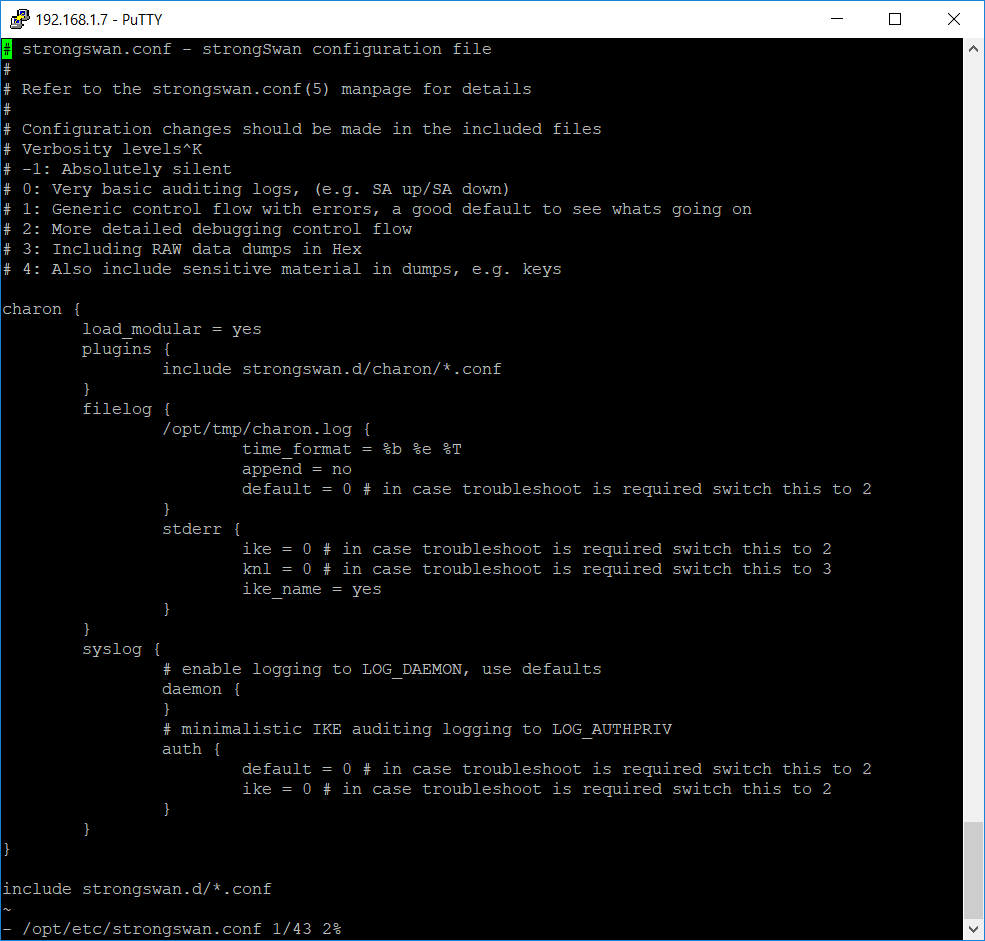
The configuration file of strongSwan is located at /opt/etc/strongswan.conf
Open the file in a text editor and override the content with the following text:
# strongswan.conf - strongSwan configuration file
#
# Refer to the strongswan.conf(5) manpage for details
#
# Configuration changes should be made in the included files
# Verbosity levels
# -1: Absolutely silent
# 0: Very basic auditing logs, (e.g. SA up/SA down)
# 1: Generic control flow with errors, a good default to see whats going on
# 2: More detailed debugging control flow
# 3: Including RAW data dumps in Hex
# 4: Also include sensitive material in dumps, e.g. keys
charon {
        load_modular = yes
        plugins {
                include strongswan.d/charon/*.conf
        }
        filelog {
                /opt/tmp/charon.log {
                        time_format = %b %e %T
                        append = no
                        default = 0 # in case troubleshoot is required switch this to 2
                }
                stderr {
                        ike = 0 # in case troubleshoot is required switch this to 2
                        knl = 0 # in case troubleshoot is required switch this to 3
                        ike_name = yes
                }
        }
        syslog {
                # enable logging to LOG_DAEMON, use defaults
                daemon {
                }
                # minimalistic IKE auditing logging to LOG_AUTHPRIV
                auth {
                        default = 0 # in case troubleshoot is required switch this to 2
                        ike = 0 # in case troubleshoot is required switch this to 2
                }
        }
}
include strongswan.d/*.conf
Configure the router firewall
Add these rules to the router firewall (Administration -> Commands -> Save Firewall):
iptables -t filter -A INPUT -p udp --dport 500 -j ACCEPT
iptables -t filter -A INPUT -p udp --dport 4500 -j ACCEPT
iptables -t filter -A INPUT -p esp -j ACCEPT

Reboot the router in order to apply the firewall rules.
This concludes the installation and configuration of the strongSwan.
In the last part we are going to use the Azure RM Portal to deploy a site-to-site template and configure the IPSec on the router. This is the last step and after that you will have a working site-to-site VPN connection from your home network to Azure: